Team Management
Add staff, set their schedules, control what they can access, and generate partner login links
The Team Management page is where you manage everyone who works at your salon — their profiles, working hours, service permissions, login accounts, and partner access links.
Click Team in the left menu to get started. The page is divided into two sections: Team Members and Authenticated Users.
Team Members
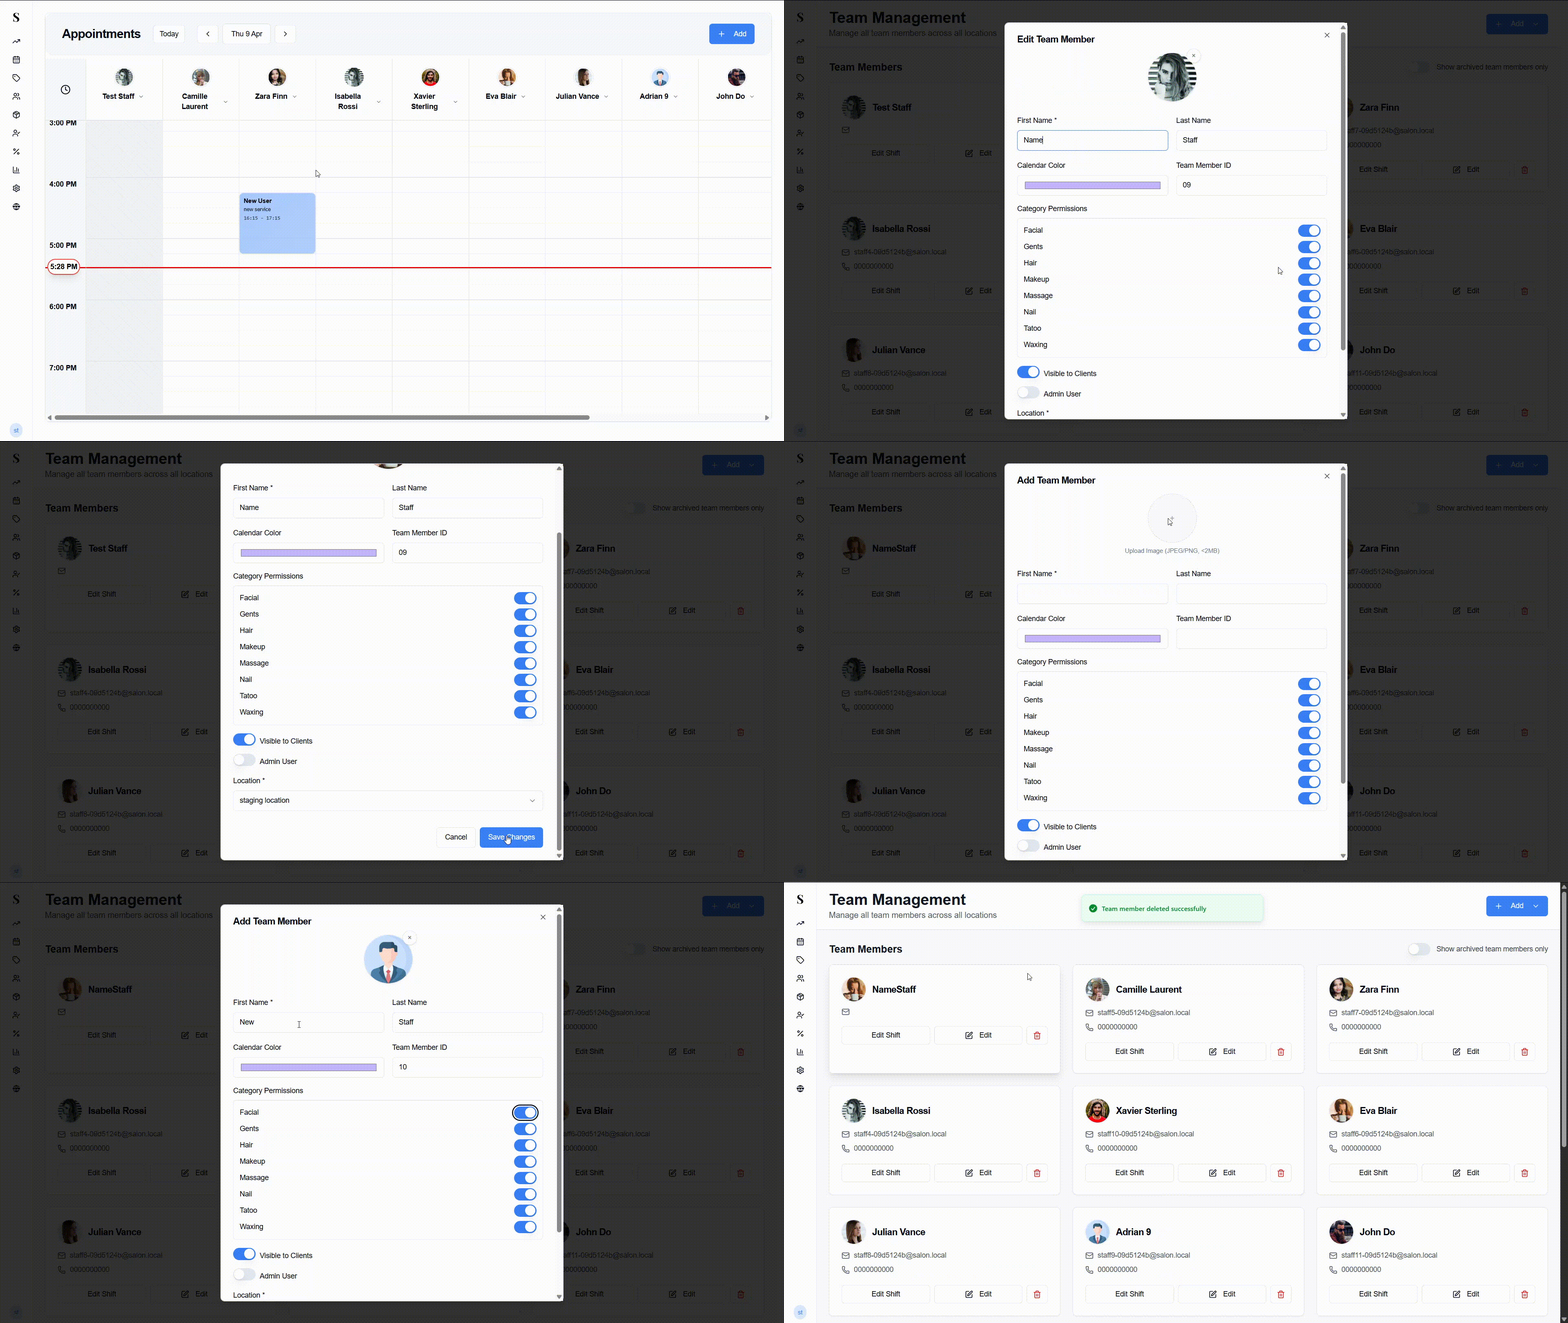
Team Members are the staff profiles that appear on the Calendar. Each card shows the staff member's photo (or initials if no photo is set), their email, phone number, and branch.
Use the search bar at the top to quickly find staff by name or email. For salons with large teams, the list includes pagination so you can navigate through pages effortlessly.
Each card has action buttons:
- Edit Shift — set their weekly working hours
- Edit — update their profile details
- Archive — safely retire a staff member while keeping all their past data intact
To view archived staff, toggle Show archived team members only in the top right corner.
Archiving vs Deleting: Staff members cannot be permanently deleted. Instead, they are archived. This protects your salon's business history — all past appointments, sales records, and commission reports remain completely intact and accurate.
Adding a team member
Click + Add → Add Team Member. A form will pop up.
Click the + circle at the top to upload a profile photo (JPEG or PNG, under 2 MB). This helps identify staff on the Calendar.
Enter their First Name (required) and Last Name.
Set a Calendar Color — this is the color used for their column on the Calendar. Each staff member should have a distinct color to make them easy to tell apart.
Optionally enter a Team Member ID — useful if your business uses internal staff ID numbers.
Enter their Email and Phone Number — these appear on their profile card and are used for partner login links.
Set Category Permissions — toggle on the service categories this staff member is allowed to perform (e.g., Hair, Nails, Facial). All categories are enabled by default. Staff will only appear as a booking option for the categories you enable.
Add Skill Tags (such as Color Specialist, Bridal Styling, Nail Art) to highlight specializations and help match clients to the right team member.
Toggle Visible to Clients on if this staff member should appear in client-facing online booking. This is on by default.
Toggle Admin User on if they need full access to the system (Reports, Settings, Commission, Dashboard). Off by default.
Select a primary Location (required).
Click Add Team Member.
Editing a team member
Click Edit on any team member card to update their photo, name, calendar color, email, phone number, category permissions, skill tags, admin status, or location.
You cannot remove admin access from the last remaining admin. Make sure at least one other admin exists before making that change.
Skill tags & service templates
You can assign Skill Tags to your stylists (e.g., Balayage, Skin Fade, Eyelash Extensions). These tags help the front desk match client requests with the best specialist when scheduling appointments.
Salons can also apply Service Templates to quickly assign a predefined bundle of services, pricing, and service durations to a stylist without having to select services one by one.
Setting working hours (Edit Shift)
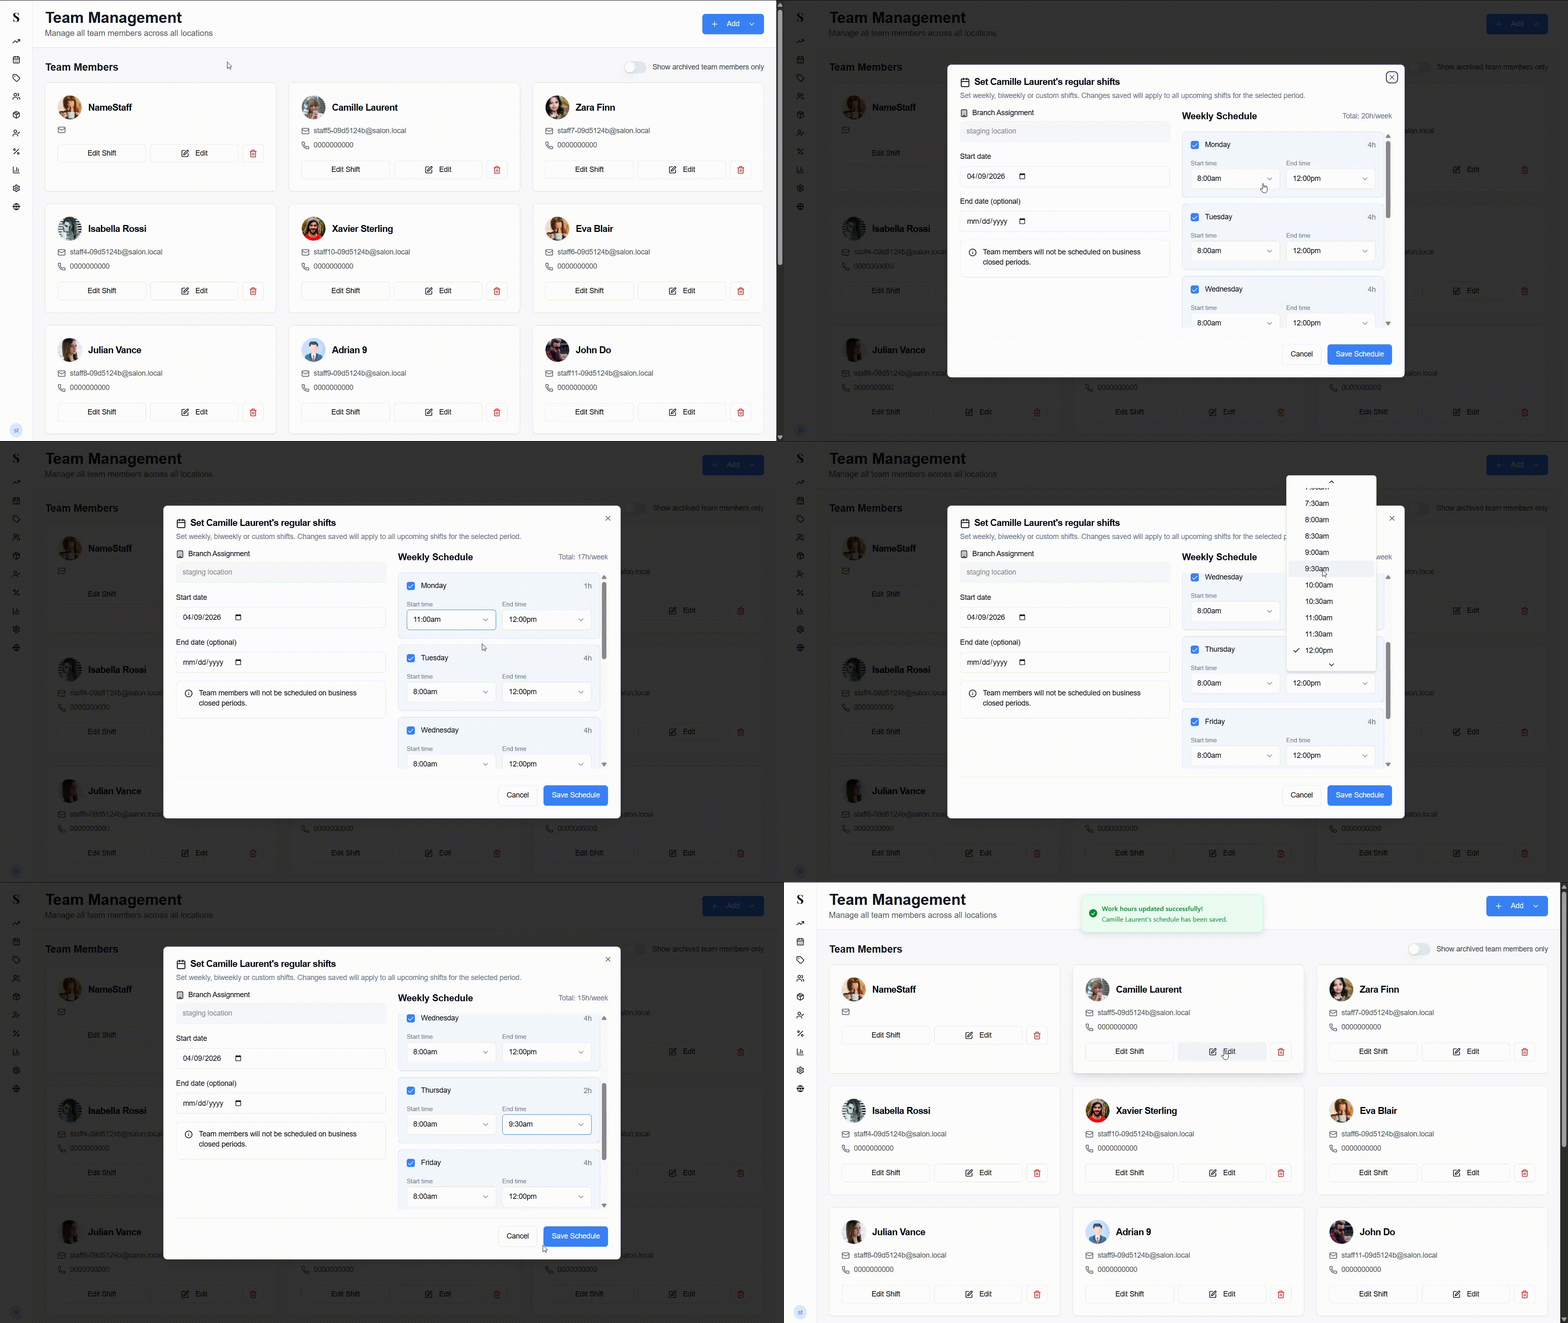
Each staff member can have their own weekly schedule so the Calendar only shows them as available when they are actually working.
Click Edit Shift on the team member's card.
For each day of the week, set their start and finish time.
Mark any day as Off if they do not work that day.
Click Save.
Stylist performance dashboard
You can view an individual performance view for each stylist. It shows:
- Total revenue generated for the period
- Number of completed appointments and unique clients served
- Daily schedule overview
- Gratuity and tip totals earned
This helps managers review staff productivity and run one-on-one reviews.
Cross-branch staff access & shifts
If your business operates across multiple locations:
- Cross-branch access: Admins can grant staff permission to view and edit appointments and sales at other branches.
- Multi-location shifts: When permitted, receptionists can change a staff member's working location from another branch. This allows stylists to work at Branch A on Mondays and Branch B on Tuesdays without needing multiple accounts.
Authenticated Users
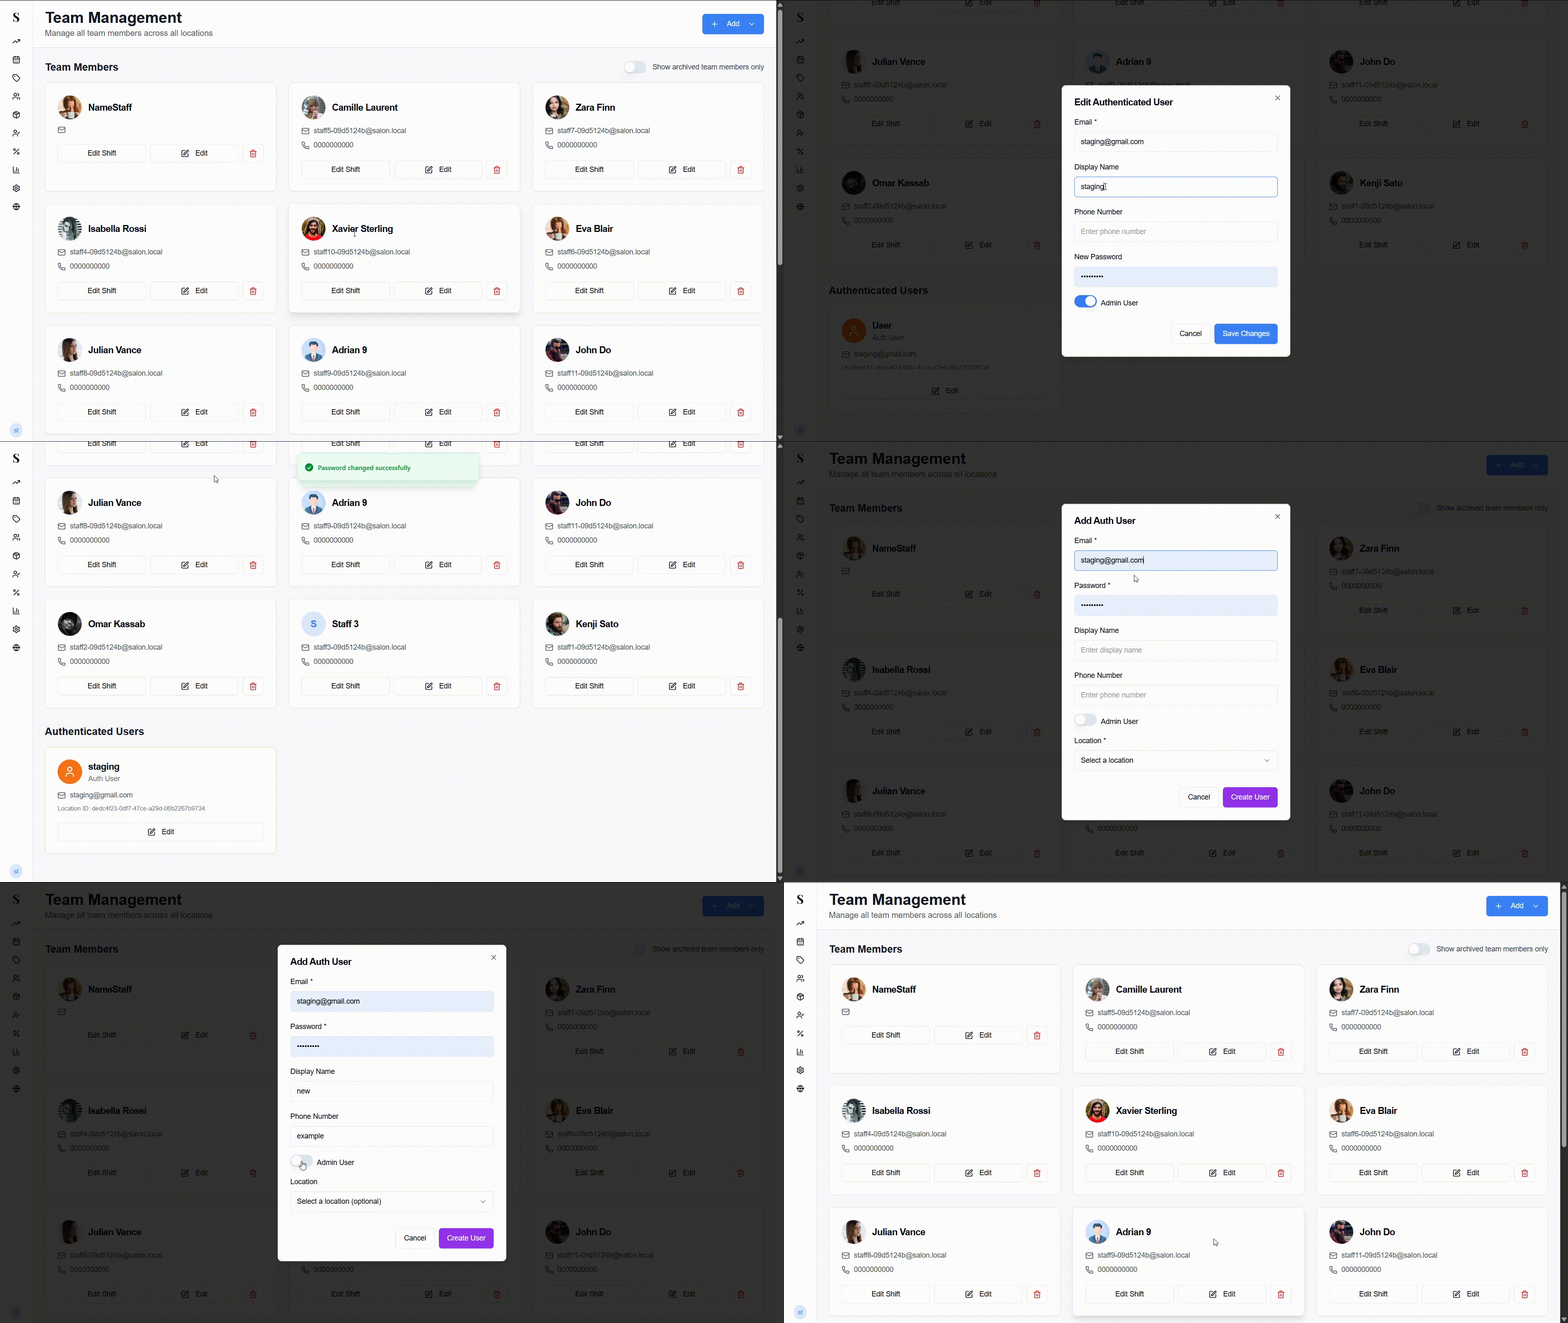
The Authenticated Users section sits below the team member grid and shows all staff login accounts. These cards have an orange border to distinguish them from team member profiles.
Each card shows the user's name, their Auth User label, email address, and Location ID.
A team member profile and a login account are two separate things. A team member profile controls how someone appears on the Calendar. A login account controls how they log in to NxCut. Most staff will need both.
Adding a login account (Auth User)
Click + Add → Add Auth User. A form will pop up.
Enter their Email (required) — this will be their username when logging in.
Set a Password (required). A 6-character password is generated automatically, or you can set your own.
Optionally enter a Display Name and Phone Number.
Toggle Admin User on if they should have full system access.
Select a Location (required).
Click Create User. The account is active immediately.
Converting a team member to an Auth User
You can also give an existing team member a login account, without creating a separate Auth User.
Open the team member's profile to edit it.
Toggle Auth User on. This creates a login account for them so they can sign in to the POS as a receptionist.
Toggle Admin User on if they should have full system access. You will be prompted to set a password.
Save. An orange Auth User badge appears to the right of their name.
Because this becomes an auth user, the email must be unique to that user. An email already used by another account will not be accepted.
Partner login link
You can generate a quick login link that lets a team member access NxCut without needing to remember their password. This is especially useful when onboarding new staff or when someone is having trouble logging in.
Open the team member's profile by clicking Edit on their card.
Click Generate Partner Login Link.
A login link is generated. Click Send via WhatsApp to share it directly with the staff member.
The link opens NxCut and logs the staff member in automatically. Links are single-use and expire after a short period.
Partner login links are also useful for staff who work at multiple locations — you can send them a link that routes them to the correct branch automatically.
Archiving a team member
If someone leaves or takes extended leave:
- Open their profile and choose Archive.
- Archived members are hidden from the default calendar and team view.
- Toggle Show archived team members only at the top of the page whenever you need to view their profile.
- All historical bookings, sales, and past commission slips remain fully preserved.
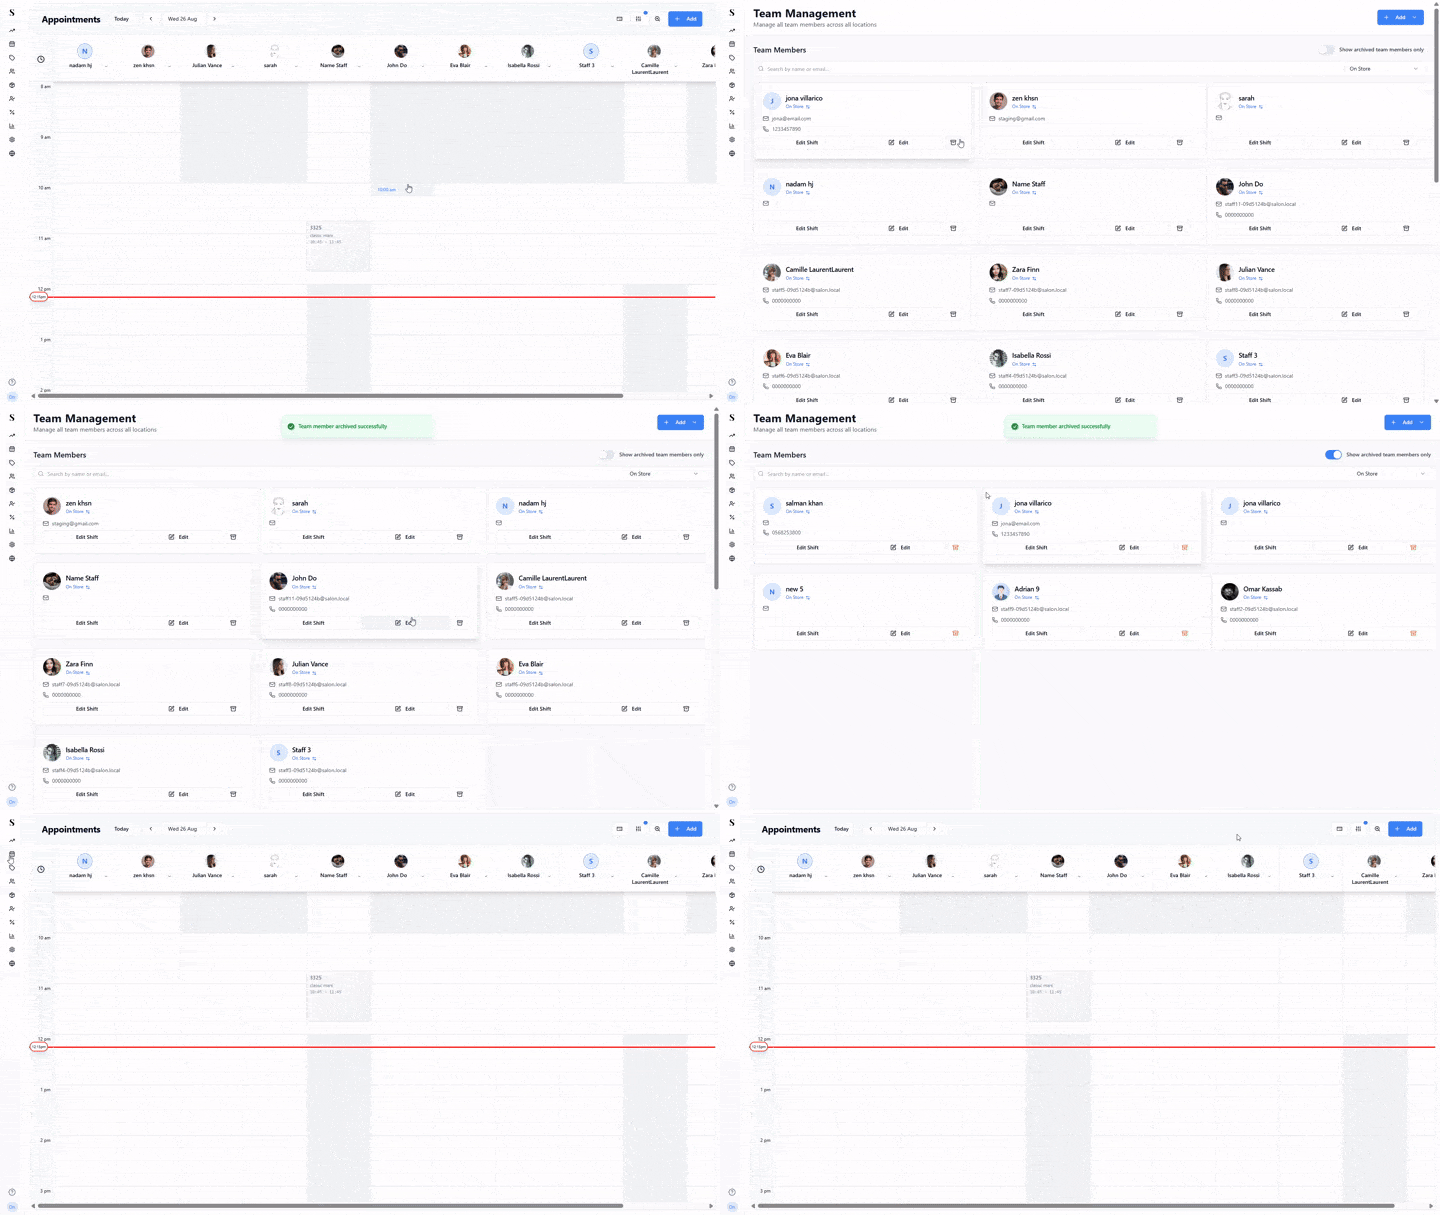
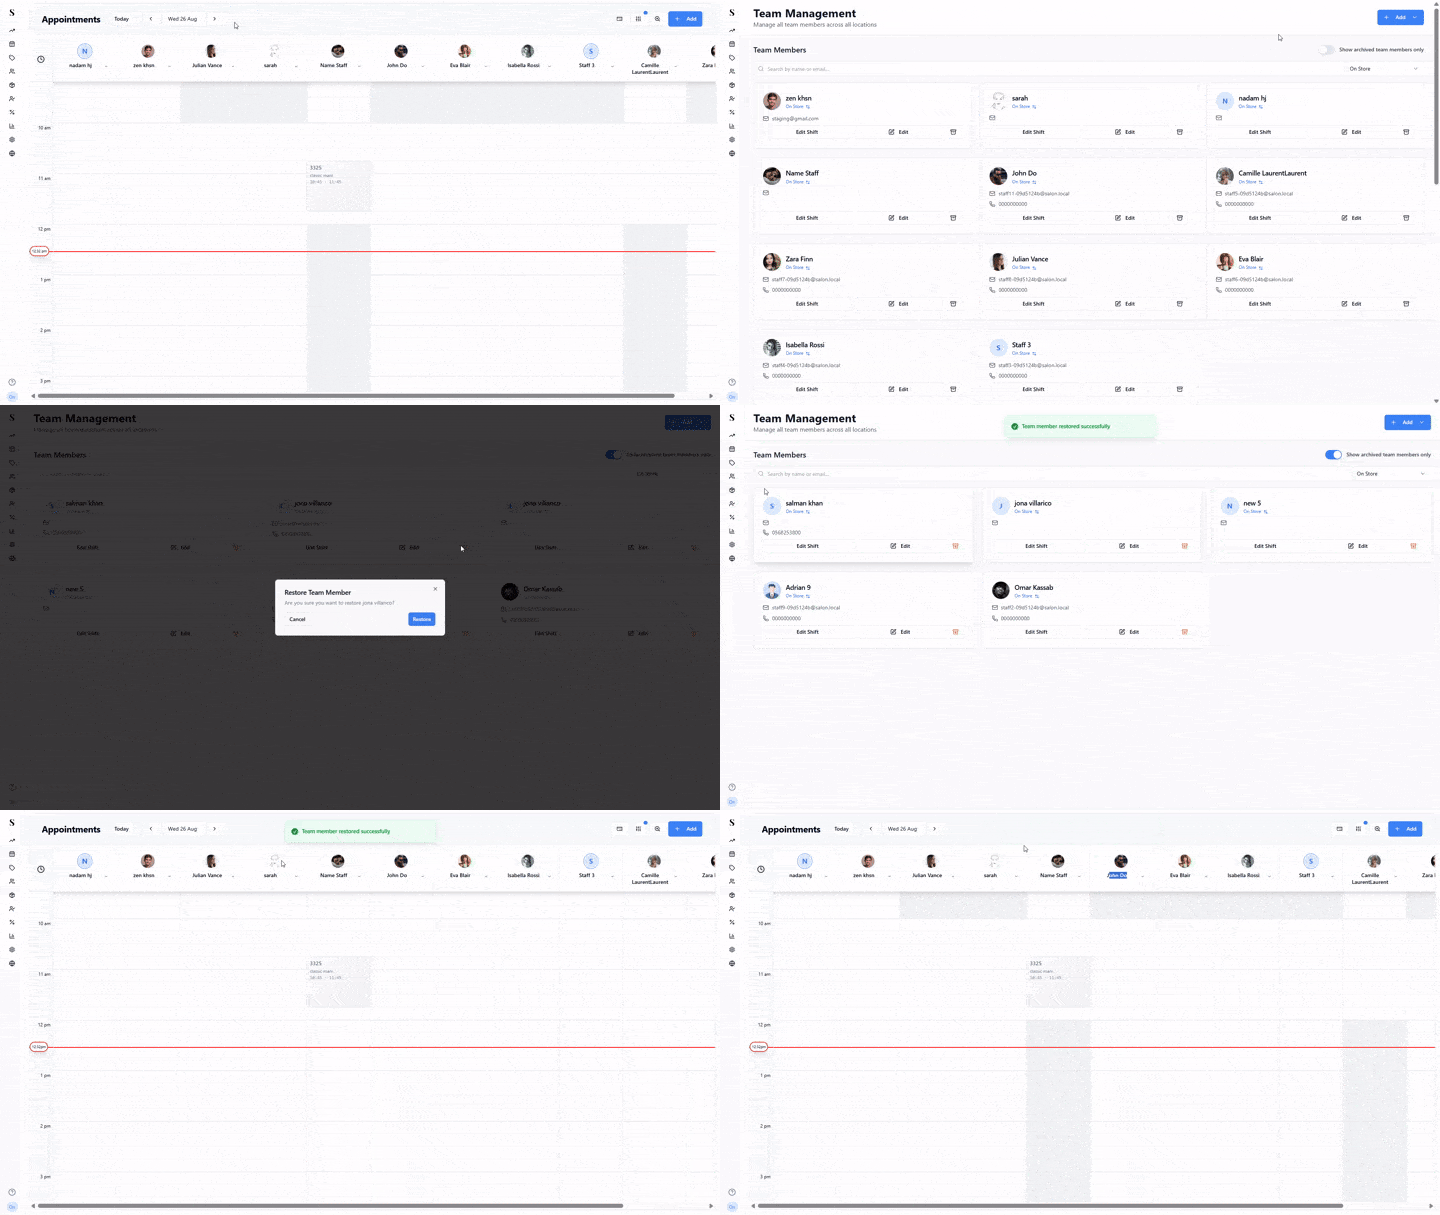
Restoring an archived team member
Bringing someone back is just as quick as archiving them:
Toggle Show archived team members only at the top of the Team Members page to reveal the archived staff grid.
Click Restore on the archived staff member's card.
Confirm in the Restore Team Member dialog that pops up.
Once restored, the team member reappears in the active Team Members list with all their history intact.
Quick reference
| What do you want to do? | How? |
|---|---|
| Add a new staff member | Click + Add → Add Team Member |
| Give them a login to NxCut | Click + Add → Add Auth User |
| Set when they work each week | Click Edit Shift on their card |
| Assign stylist specializations | Add Skill Tags in their profile |
| Control which services they can do | Edit their profile and toggle service categories |
| Stop them appearing in online booking | Edit their profile and turn off Visible to Clients |
| Give someone full access to everything | Turn on Admin User in their profile |
| Send a quick login link via WhatsApp | Edit their profile and click Generate Partner Login Link |
| Hide a staff member who left | Click Archive — their past sales and appointments stay safe in the system |
| Bring back an archived staff member | Toggle Show archived team members only → click Restore → confirm |
| Let a stylist work across branches | Enable cross-branch access in permissions |