Thermal Printing
Set up and use thermal receipt printing in NxCut
NxCut supports thermal receipt printing in two ways. The recommended path is the Print Bridge — a small background app you install once on the salon PC. If you prefer not to install anything, the browser-based WebUSB path is still available as a fallback.
Which method should I use?
| Print Bridge | WebUSB (browser) | |
|---|---|---|
| Installation required | Yes — one-time | No |
| Works with Windows printer drivers | Yes | No |
| Works with COM port printers | Yes | No |
| Requires Zadig driver swap | No | Yes |
| Prints silently (no popups) | Yes | No — browser asks on first use |
| Re-prints with Enter key | Yes | Yes |
Recommendation: Use the Print Bridge. It works with any printer that Windows already recognises, prints silently after checkout, and requires no browser configuration.
Option 1 — Print Bridge (recommended)
Step 1: Install the app
-
Download NxCut Print Bridge using the link below and run the installer (admin rights required — installs per machine).
-
Once installed, the app starts automatically and appears in the system tray (bottom-right corner of the taskbar).
Step 2: Allow network access in NxCut
The first time you use thermal printing in NxCut, the browser will show a security prompt:
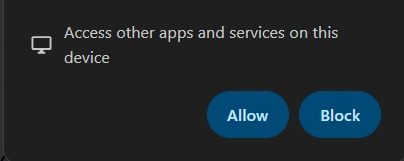
"Access other apps and services on this device"
Click Allow. This lets the NxCut web app communicate with the Print Bridge running on your PC. Without this, printing will not work.
Step 3: Select your printer and run a test print
-
Right-click the tray icon and choose Open Settings.
-
In the Printer dropdown, find your printer. Printers are grouped:
- Windows Printers — if your printer is already listed in Windows Settings → Printers & scanners, it appears here. Start here.
- Serial / COM ports — if your printer shows up as COM3, COM4, etc. in Device Manager.
- USB devices (WinUSB) — only after completing the Zadig step (see below).
-
Select your printer and click Save.
-
Click Test Print. Your printer should produce a small slip that reads:
NxCut Print Bridge
Test Print OK
Only proceed once this test slip prints successfully. If nothing prints, check the troubleshooting section below before continuing.
-
Once the test print works, enable Start on login so the bridge starts automatically every time the PC turns on. You will see a green Connected indicator at the bottom of the settings window when everything is ready.
-
You can now close the settings window.
Step 4: Verify the tray icon
| Icon colour | What it means |
|---|---|
| Green dot | Bridge running, printer connected — ready to print |
| Yellow dot | Bridge running, no printer selected or unreachable |
| Red dot | Bridge stopped or error |
The tray icon should be green before you start taking payments.
Step 5: Print from NxCut
That's it. When a checkout completes in NxCut, the receipt prints automatically — no browser dialogs, no button clicks needed.
If the receipt doesn't print automatically, press Enter on the keyboard while the sale detail screen is open to retry.
COM port setup (Option B)
If your printer appears as a COM port in Device Manager:
- Select it under Serial / COM ports in the bridge settings.
- The default baud rate is 9600 — this matches the iCE POS factory default. Only change it if you have manually reconfigured the printer.
- Click Test Print.
USB direct via Zadig (Option C)
Use this only if the printer does not appear under Windows Printers or as a COM port.
Download Zadig and run it.
Select your thermal printer from the device list.
Choose WinUSB from the driver list and click Install Driver.
Restart the NxCut Print Bridge app. The printer now appears under USB devices (WinUSB) in the dropdown.
The Zadig step is a one-time change per machine. Be aware: installing WinUSB replaces the manufacturer driver, so the printer will no longer be accessible from other Windows apps (e.g. the manufacturer's print utility). If you need that, use the Windows Printer path instead.
Option 2 — WebUSB (browser fallback)
If the Print Bridge is not running, NxCut falls back to printing directly from the browser using WebUSB.
Requirements:
- Use Google Chrome or Microsoft Edge (Firefox and Safari do not support WebUSB).
- The printer must have the WinUSB driver installed via Zadig (see Option C above).
First use:
- After checkout, click the Thermal Print button in the receipt preview.
- The browser shows a device picker — select your printer and click Connect.
- The browser remembers the device for future prints on the same machine.
Limitations compared to the bridge:
- The browser permission prompt appears on first use per machine.
- Does not work with Windows-driver or COM port printers.
- Cannot print silently in the background.
How printing works after checkout
When a payment is completed in NxCut:
- NxCut checks silently whether the Print Bridge is running (takes under 300 ms).
- If the bridge is running and has a printer configured, the receipt is sent and printed immediately — no action needed from staff.
- If the bridge is not running, NxCut tries to print via any previously paired WebUSB device.
- If neither works, an amber banner appears on the sale screen: "Printer not configured". Staff can press Enter or click the thermal print button to retry.
Re-printing a receipt
On any completed sale:
- Press Enter to silently re-send the receipt to the thermal printer (bridge or WebUSB).
- Or open the sale, click the print icon, and choose Thermal Print from the receipt preview dialog.
Troubleshooting
Printer not in the dropdown
- Click the refresh button next to the dropdown in the bridge settings.
- For Windows Printers: confirm the printer appears in Windows Settings → Printers & scanners.
- For COM ports: check Device Manager → Ports (COM & LPT).
Test print does nothing (Windows Printer)
- Open Windows Settings → Printers & scanners, select the printer, and check its print queue for errors.
- Make sure the printer is not paused or showing as offline.
Test print does nothing (COM port)
- Confirm you have the right COM port selected — check Device Manager.
- Try changing the baud rate to match what the printer is configured to use (default is 9600 for iCE POS).
"Access denied" on COM port
- Another app may have the port open. Close any printer utility software and try again.
Amber "Printer not configured" banner after checkout
- Check the tray icon — if it's yellow or red, the bridge can't reach the printer.
- Click Test Print in bridge settings to confirm the printer is responding.
- If using WebUSB, make sure you are on Chrome or Edge and have previously paired the device.
Bridge not starting / tray icon is red
- Port 7070 may be in use by another app. Open bridge settings → Advanced and change the server port to 7071 or any free port. NxCut probes the full range automatically.
Receipt printed but content looks wrong
- Check the printer is set to 58mm or 80mm paper width to match what the salon has configured in NxCut store settings.