Clients
Manage your client database — add, search, merge duplicates, assign VIP cards, and view full client profiles
The Client List is your salon's client database. Every person who visits your salon can have a profile here, making it easy to look them up, track their history, and manage their memberships and vouchers.
Click Clients in the left menu to get started.
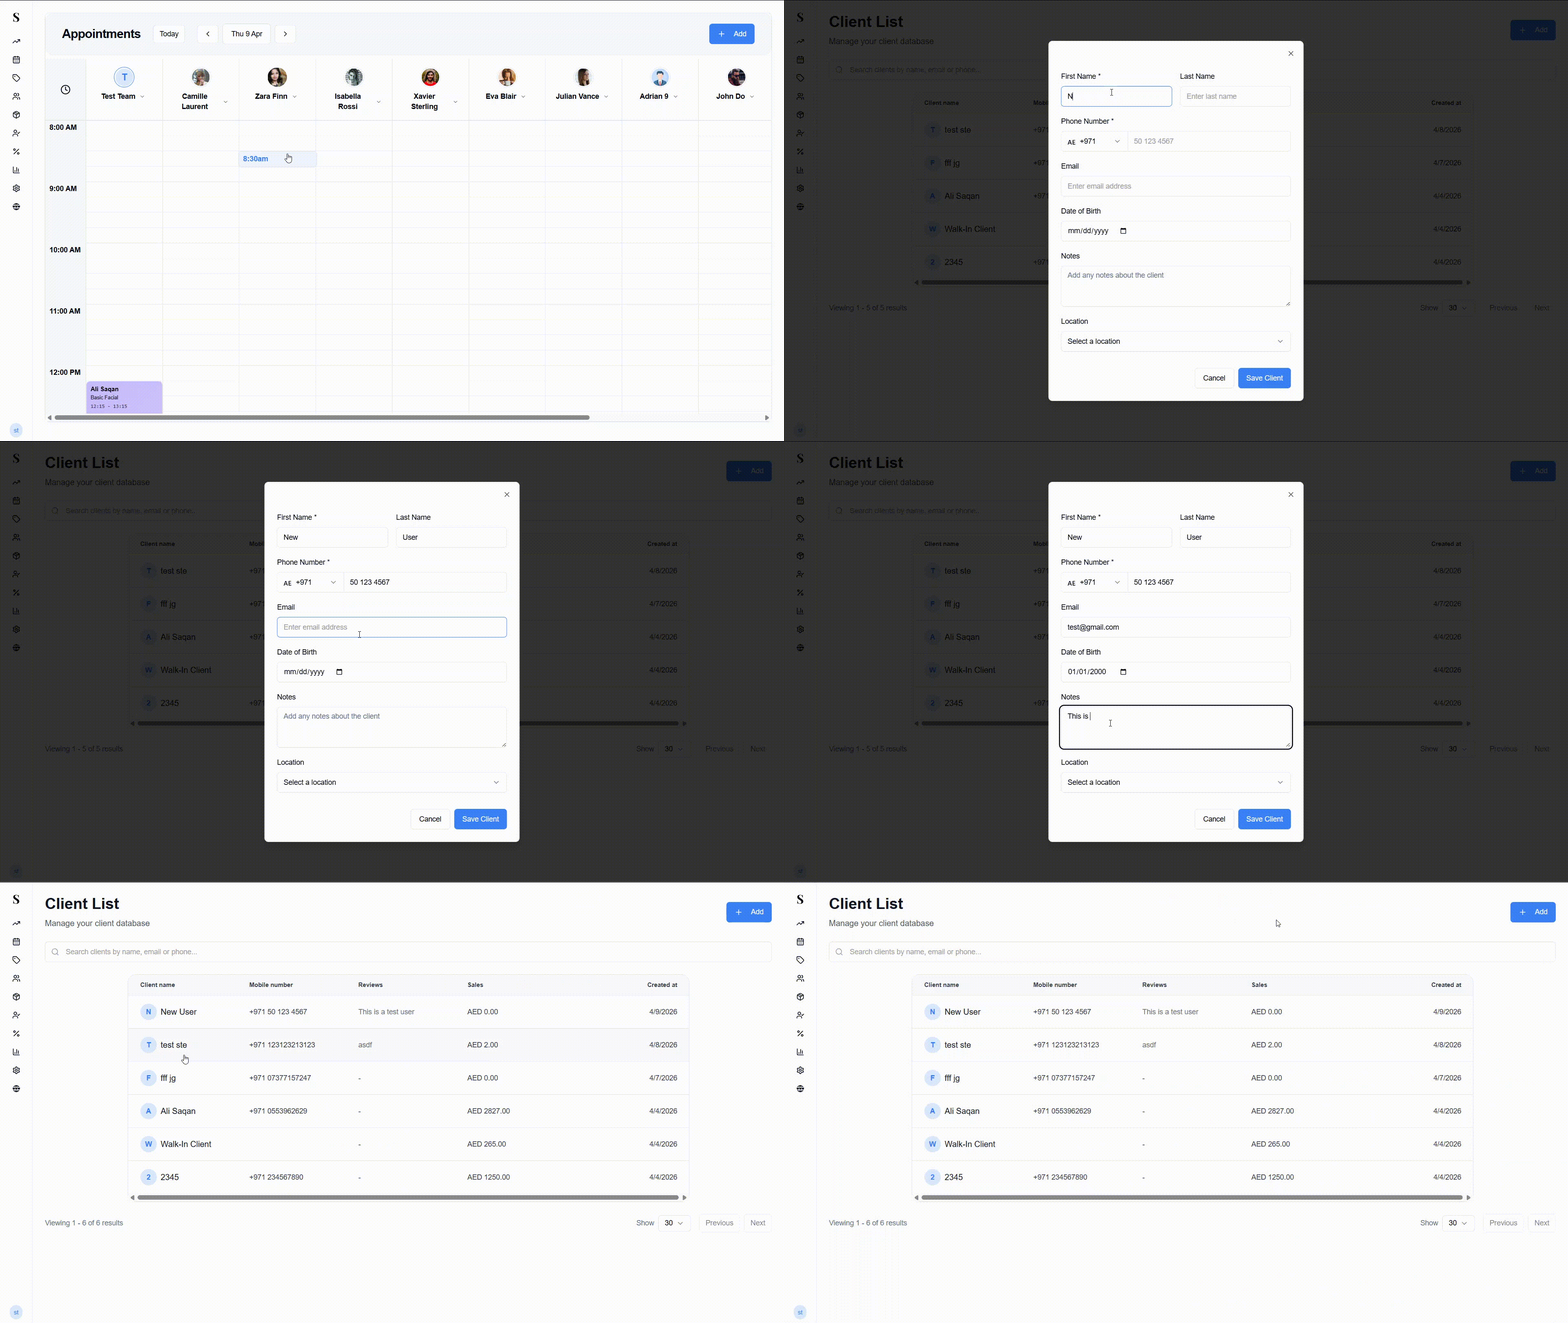
The client list
The main view shows a table of all your clients with the following columns:
| Column | What it shows |
|---|---|
| Client name | Name with an avatar (initials if no photo) |
| Mobile number | Their phone number |
| Reviews | Internal reviews added by your team |
| Sales | Total amount spent across all visits |
| Created at | When the client was added to the system |
Use the search bar at the top to find anyone by name, email, or phone number.
The list is paginated — use the Previous / Next buttons at the bottom to navigate, and adjust the Show dropdown to control how many results appear per page.
Adding a new client
Click the + Add button in the top right corner. A form will pop up.
Fill in the client's details:
- First Name (required)
- Last Name
- Phone Number (required — select the country code from the dropdown)
- Date of Birth
- Notes — any internal notes about the client
- Location — assign them to a specific branch
Click Save Client. They will appear in the list and be available for booking straight away.
You can also add a client on the spot while booking an appointment in the Calendar — no need to come here first.
Smart Phone Number Normalization
To prevent accidental duplicate client accounts, NxCut normalises phone numbers automatically. For example, numbers entered as 055... or 050... are treated identically to 55... and 50.... Spaces, dashes, and international prefixes are handled seamlessly so your database stays clean.
Viewing a client's profile
Click on any client's name to open their full profile in a panel. The profile has three sections:
Left — Client details
- Name, phone, and email
- Client Favorites: Highlights the client's most frequently booked services and favourite retail products at a glance.
- Edit client — update any of their details
- Add review — leave an internal note or review about this client
- Date of birth (can be added here if not set)
- Date the client was added to the system
Middle — Navigation tabs Switch between different parts of the client's history:
| Tab | What it shows |
|---|---|
| Appointments | All appointments with status (Paid, Scheduled, No Show, etc.) |
| Sales | All completed sales with service name, total, and View Details |
| Products | Products purchased by this client |
| Vouchers | Vouchers linked to this client — filter by status (e.g. Used, Active), sort by date. Click a voucher to see its code, expiry, and used amount, with links to View sale and View activity |
| Memberships | Active and completed membership packages with session counts |
| Loyalty | Loyalty programme activity and Privilege / VIP Card tier assignments |
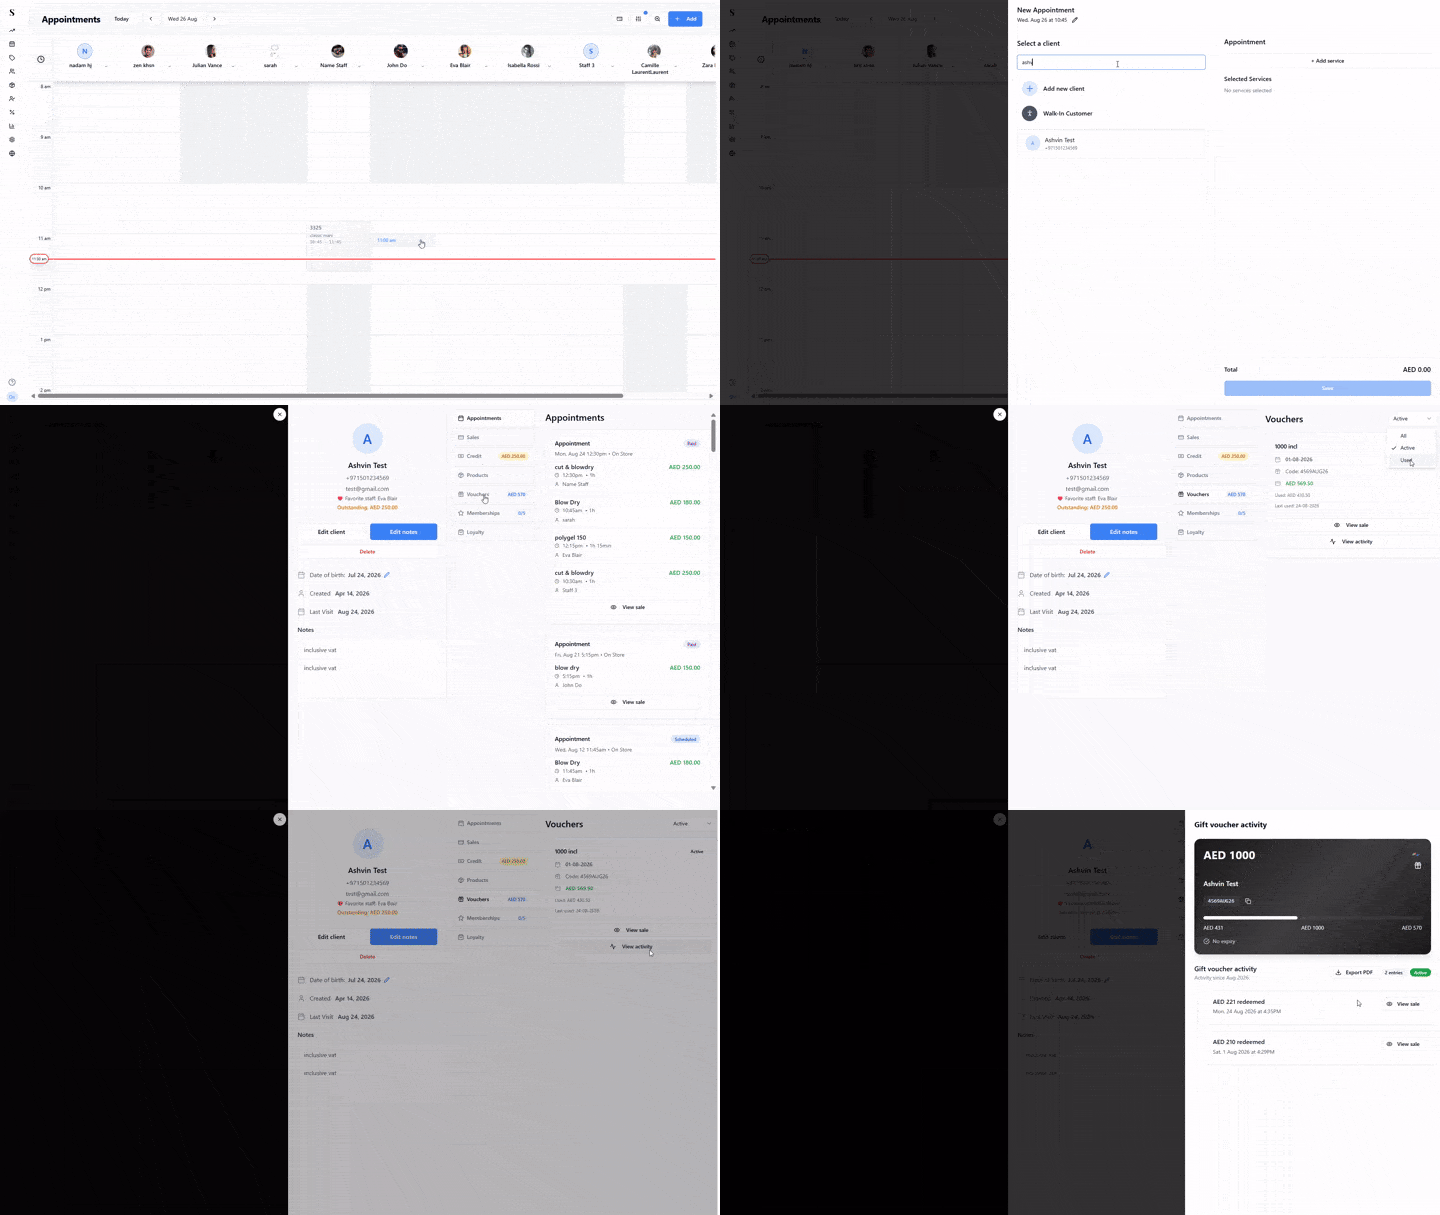
Right — Detail view Clicking any item in the tabs shows the full detail. For example, clicking a sale opens the VAT invoice with the service, staff, subtotal, VAT, and total — with options to print or void the sale.
The client profile panel adapts to your screen. On a desktop, it opens as a side panel. On smaller screens or when viewing from the Merge Duplicates page, a compact narrow view is used so you can still see all the important details without taking up too much space.
Assigning Privilege & VIP Cards
You can assign a client to a custom Privilege Card (such as VIP, Gold Member, or Corporate tier) directly in their profile:
- Open the client's profile and navigate to the Loyalty tab (or card assignment dropdown).
- Select the Privilege Card tier for this client.
- Once assigned, their preset discount percentage is automatically applied during checkout whenever they visit any branch in your group.
Merging duplicate clients
If the same client accidentally ends up with two profiles — for example, they were added once with their full name and once with just a first name — you can merge them into one clean profile.
From the Clients page, click the Merge button at the top.
The Merge Duplicates page shows a list of potential duplicate pairs — clients who share similar names, phone numbers, or emails.
Review each pair. Use the checkbox to select the duplicates you want to merge, or use Select All to merge everything at once.
Click View Profile next to any client to see their full details before deciding. On desktop this opens as a full blue button; on mobile it shows as an icon to save space.
Click Merge Selected to combine the selected duplicates.
When profiles are merged:
- All appointments, sales, memberships, and vouchers move to the primary profile
- The duplicate profile is removed
- The client's history stays intact — nothing is lost
Merging cannot easily be undone. Review each pair carefully before merging — use the View Profile button to check that both profiles really belong to the same person.
Quick reference
| What do you want to do? | How? |
|---|---|
| Find a client | Type their name, phone, or email in the search bar |
| Add a new client | Click + Add and fill in their name and phone number |
| See a client's favorite services | Look at the Favorites section in their profile |
| Assign a VIP or Privilege card | Open profile → Loyalty → assign card tier |
| Filter & sort client vouchers | Open profile → Vouchers → use date sort & filter |
| Merge two client profiles into one | Click Merge from the Clients page |